
Overview
QuadC Early Alerts enables higher education student success teams to proactively identify students who need academic, financial, or personal support before they slip through the cracks. By intervening early, institutions improve retention rates, safeguard student outcomes, and protect crucial tuition revenue.
With our AI Advisor, you no longer need complex data-query skills or advanced spreadsheet formulas. Simply type what you’re looking for in plain language, and QuadC turns your question into actionable student filters.
Step 1: Set Up & Configure Your Workspace Data
Before filtering students, your workspace needs access to your institution’s student data.
Pro-Tip: If your institution has integrated QuadC with your Learning Management System (LMS) or Student Information System (SIS), your data syncs automatically. You can skip the manual upload steps below and head straight to Filtering Data.
- Navigate to Workspaces and click Create New Workspace.
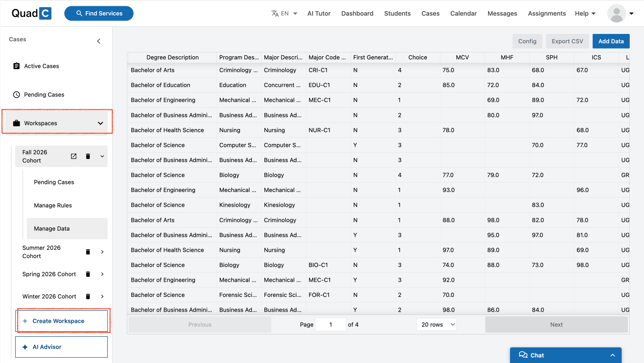
- Select Upload Data to upload a CSV file, or choose an existing data file from your library.
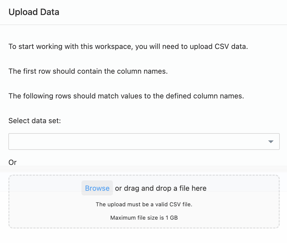
- Configure Column Mapping (Required for new CSV uploads):
- Match your CSV’s Column Name fields to QuadC’s Data Type options.
- Crucial Step: Set a Primary Data Link by mapping either
Student Number (Primary Data Link)orEmail (Primary Data Link). This guarantees accurate student identification across systems. - Map all numerical fields (such as GPA, course grades, or account balances) to the Number data type to ensure numerical filtering works correctly.
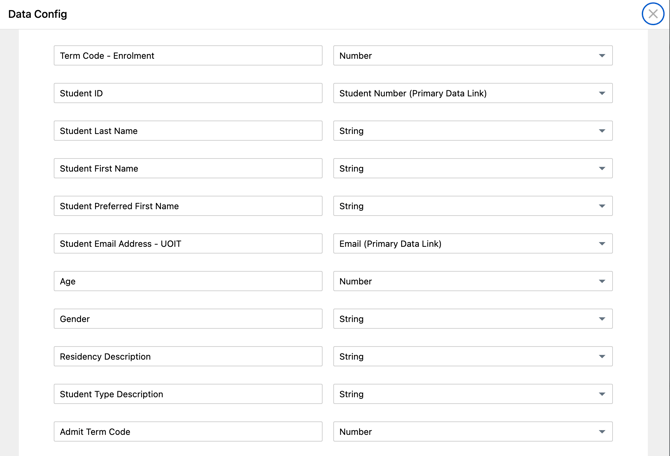
- Click Save Configuration.
Step 2: Identify At-Risk Students Using the AI Advisor
- Select the Manage Data tab to view your complete student roster.
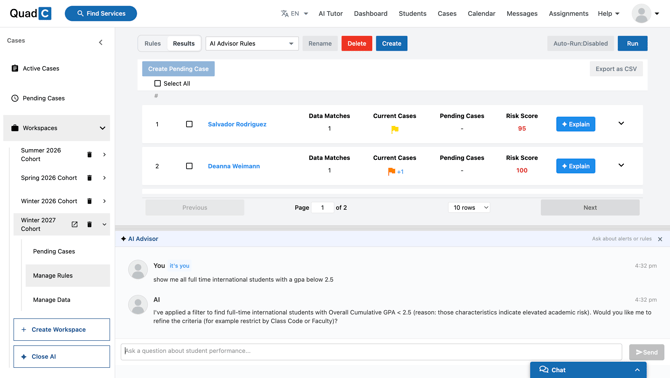
- Open the AI Advisor chat window.
- Type a natural-language prompt specifying the criteria for students you want to support.
- Example 1:
"Show me full-time students with a GPA below 2.5" - Example 2:
"Show me first-generation students with a tuition balance owing of $500+"
- Example 1:
- The AI Advisor automatically converts your request into a live database query and populates the results under the Results tab inside Manage Rules.
Step 3: Deep-Dive into Risk Factors with AI Explanations
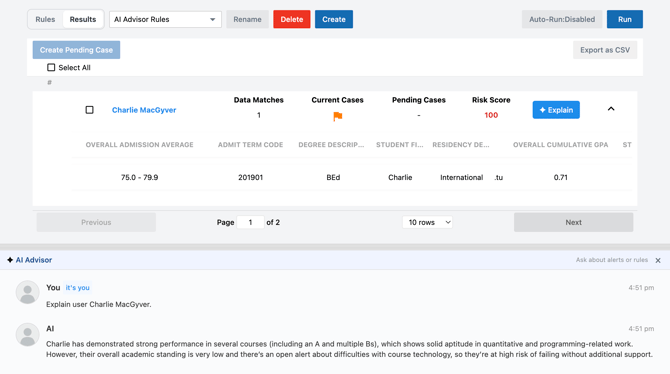
- In the filtered results, review the calculated Risk Score and any active or pending cases assigned to each student.
- Click Explain next to any student profile. The AI Advisor will generate a plain-language summary detailing why the student is marked as at-risk and which specific indicators contributed to their score.
- Click Expand Results on a student row to inspect granular details, such as academic trends, course-level engagement, or financial obligations.
Step 4: Initiate Support (Creating Pending Cases)
Once you’ve identified students requiring intervention:
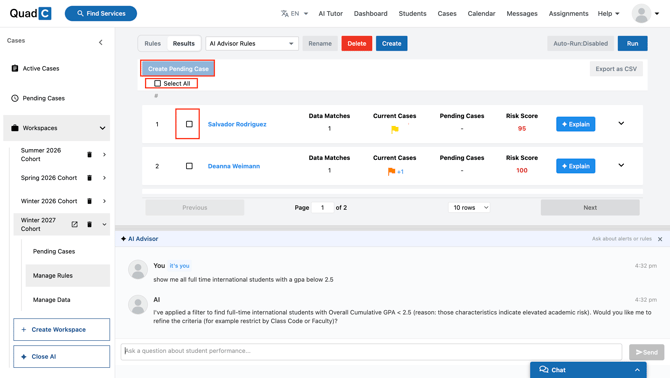
- Select individual students using the checkboxes, or click Select All.
- Click Create Pending Case.
- In the setup window, specify:
- Service Type: Select the support department best suited to help (e.g., Advising, Tutoring, Financial Aid, Counselling).
- Priority Level: Set as High, Medium, or Low based on institutional thresholds.
- Assign Reviewer: Select the manager or team lead responsible for reviewing and approving alerts.
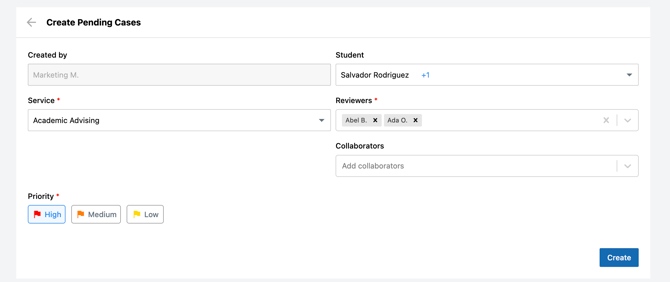
- Click Create. The alerts will be routed to the assigned reviewer’s queue under the Pending Cases tab.